Gardening during the winter months in USDA Zone 5 and 6, may seem challenging, but with a hoop house over a raised bed, you can extend your growing season and enjoy fresh produce even in the colder months. When most people think of gardening, they imagine warm, sunny days, lush green plants and vibrant flowers. But gardening doesn’t have to end when the temperature drops. Cold-weather gardening can be a rewarding experience, offering fresh produce, beautiful plants, and a sense of accomplishment during the winter months. With the right strategies, you can grow and maintain a thriving garden even when frost sets in. Here’s how.
As an Amazon Associate, I earn from qualifying purchases.
Extend the Growing Season
One of the keys to cold-weather gardening is protecting your plants from frost and freezing temperatures. Season-extending techniques can help your garden continue to produce well into the winter. Here are a few popular methods:
- Cold frame: These simple structures consist of a clear top (usually glass, plexiglass or plastic) and a frame to trap heat while protecting plants from the cold. Common cold frame materials include wood, brick, cinder blocks or even straw bales.In the garden, they are often partially buried in the soil to take advantage of the natural thermal protection that going underground provides.
- Row cover: Considered the first line of defense after a good old fashioned bed sheet, row covers are also known as frost blankets. This lightweight fabric laid over crops can provide a layer of insulation and frost-protection without blocking out all light. Row cover can also protect from pests and can act as a blanket on the coldest of nights inside your cold frame, hoop house or greenhouse. Like the hoop house, row covers are often attached to hoops to lift the material off the plants.
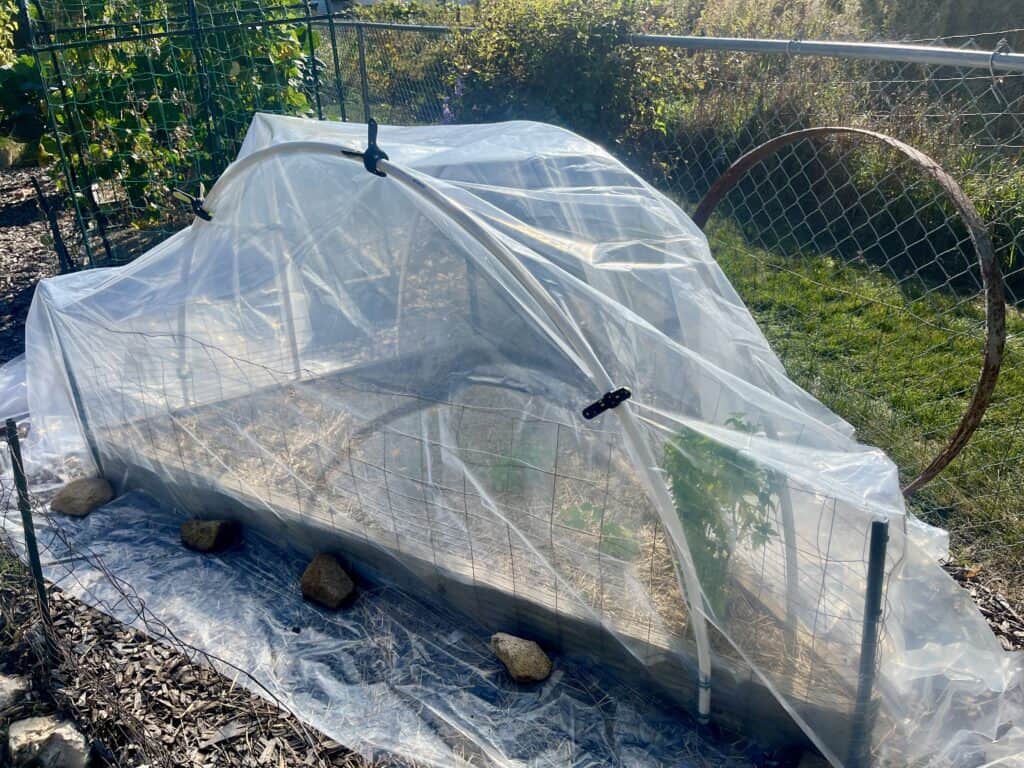
- Hoop house: A plastic sheeting covered structure used to grow crops in a protective environment. Although it can be free-standing, I love creating a hoop house over a raised bed to extend the use of your gardening space.
- Greenhouse: For serious winter gardeners, a greenhouse offers year-round growing conditions. Greenhouses offer a more permanent structure than a hoop house and often include venting (automatic or manual) and supplemental heat and water sources.
- Mulch: Mulch can be helpful year-round in your garden. Apply a several-inch thick layer of mulch, like straw or leaves, around the base of your plants to insulate the soil and protect roots from freezing. Be sure to pull back the mulch so it isn’t sitting directly on the stems which can cause rot. Mulch is also great for retaining moisture in your beds. Regardless of which season-extending option you choose, make sure it includes a layer of mulch around your plants.
Winter Gardening in a Hoop House Over Raised Beds: A Complete Guide
Winter gardening doesn’t have to be confined to just ultra cold-hardy plants and indoor pots. One of the most effective ways to extend your growing season and protect your crops from freezing temperatures is by using a hoop house over raised beds. This combination offers an excellent solution for growing vegetables and plants even in the coldest months, creating a microclimate that can keep crops alive and productive well into winter.
A hoop house is a semi-permanent greenhouse-like structure made from flexible piping or metal hoops, typically covered with plastic sheeting. Unlike traditional greenhouses, hoop houses are easy to build, more affordable, and can be set up right over raised beds, making them a perfect option for small-scale winter gardening.
Hoop houses protect plants from extreme weather conditions like frost, snow, wind, and heavy rain while letting sunlight in to create a warmer, more stable environment inside. When combined with raised beds, hoop houses take advantage of better soil drainage and higher soil temperatures, providing plants with optimal growing conditions during the winter months.
Let’s dive into the benefits of using a hoop house over raised beds, how to set it up, and what crops thrive best in this controlled environment.
Benefits of Using a Hoop House Over Raised Beds
- Ease of entry: Lots of us have raised beds or can easily build one with the help of some handy friends. A plethora of plans can be found online.
- Temperature control: The plastic sheeting traps heat from the sun, keeping the air and soil inside the hoop house warmer than the outside environment. This can raise the temperature inside by 10 to 30 degrees Fahrenheit on average, allowing you to grow crops well into winter. By opening the ends of your hoop house on more moderate days, simply pulling back the plastic sheeting and securing it to your hoops to hold it back, you can bring the temperature back down too.
- Sunshine: Ideally, your raised bed should be positioned in full sun far away from anything that might shade it. Keep in mind the shade in your yard may be different in winter than it is in summer. Sun exposure is especially important for below-freezing gardening in a hoop house. For maximum sun exposure, orient your raised bed east to west to take full advantage of the sun’s rays as it moves across the sky.
- Frost protection: The covered structure acts as a barrier against frost, one of the most significant challenges to winter gardening. Raised beds, combined with the hoop house, help keep the soil from freezing, further protecting plant roots.
- Enhanced drainage: Raised beds naturally improve soil drainage. In winter, when the ground can become saturated from rain and melting snow, this helps prevent water logged soil, which can damage plant roots.
- Better air circulation: While hoop houses protect plants from cold weather, they can also be vented by lifting the sides during warmer days to allow for better airflow, which reduces the risk of mold and disease. Our plants like to breathe in the fresh air just like we do! Just remember to close your hoop house up tight at night if forecasted low-temperatures are in the 40s or lower. Better to be safe than sorry!
- Easier maintenance: The raised bed-hoop house setup makes winter gardening more accessible by creating a designated growing space that is easier to work with, especially when compared to gardening in traditional, in-ground garden beds during cold, wet, or snowy conditions.
- Less bugs: many pests are less active in the winter, so you’re less likely to deal with the same level of insect damage as you might have during the traditional growing season.
- Mental health: Gardening is proven to improve our mood and outlook. Even handling soil can improve your mental health so get your hands dirty inside before you bundle up to head outside. And on an especially warm day, relish in sinking your hands deep into your lovely raised bed soil. Continuing to garden in winter when conditions are dreary and depression rises makes sense. There’s something special about harvesting crisp, sweet carrots or leafy greens from your own garden when it’s cold outside.
- Fresh produce on the cheap: You’ll be eating healthy delicious produce when grocery store vegetables are expensive or less flavorful.
- Family fun: Get the kids involved! Let older kids help monitor and manage your house. They’ll have fun and learn responsibity along the way. Little ones will love toddling out through the snow to take a peek at what’s happening in the hoop house. This is such a fun and educational project and your family is more likely to eat what they helped grow.
Here’s how to get started
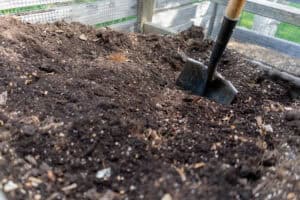
The Soil
Winter gardening puts additional stress on your plants, so ensuring your soil is healthy is crucial. Cold soil holds nutrients less effectively than warm soil, so folllow the recommendations in my 6 Essentials and amend your soil with compost or well-rotted horse or chicken manure in the fall to provide the nutrients your winter plants need. No old horse or chicken poop nearby? I feel your pain. Instead, I add compost to my existing soil plus my favorite organic fertilizer that I used in my beds in the spring again in late summer when it’s time to replant. Use this method to improve your soil if you’re planting for the first time as well.
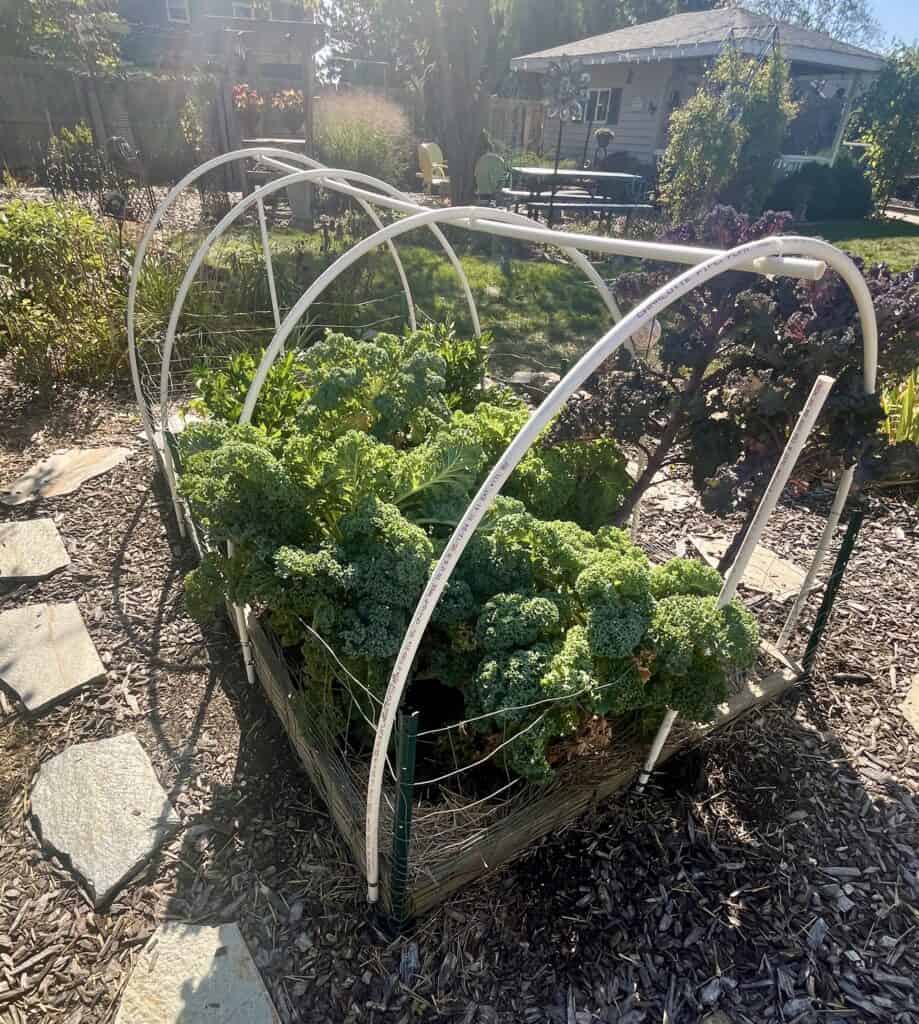
Building a Hoop House Over a 4×6 Raised Bed
A hoop house is essentially a miniature greenhouse that traps heat from the sun, protecting your crops from extreme cold. Building one over any raised bed is simple and cost-effective. This plan is specific to a 4X6 foot bed, but you can modify it to whatever size your bed is. The size provided here is simply to enable a true plan you can follow. I frequently hoop house a triangle-shaped raised bed! Adapt to your size needs.
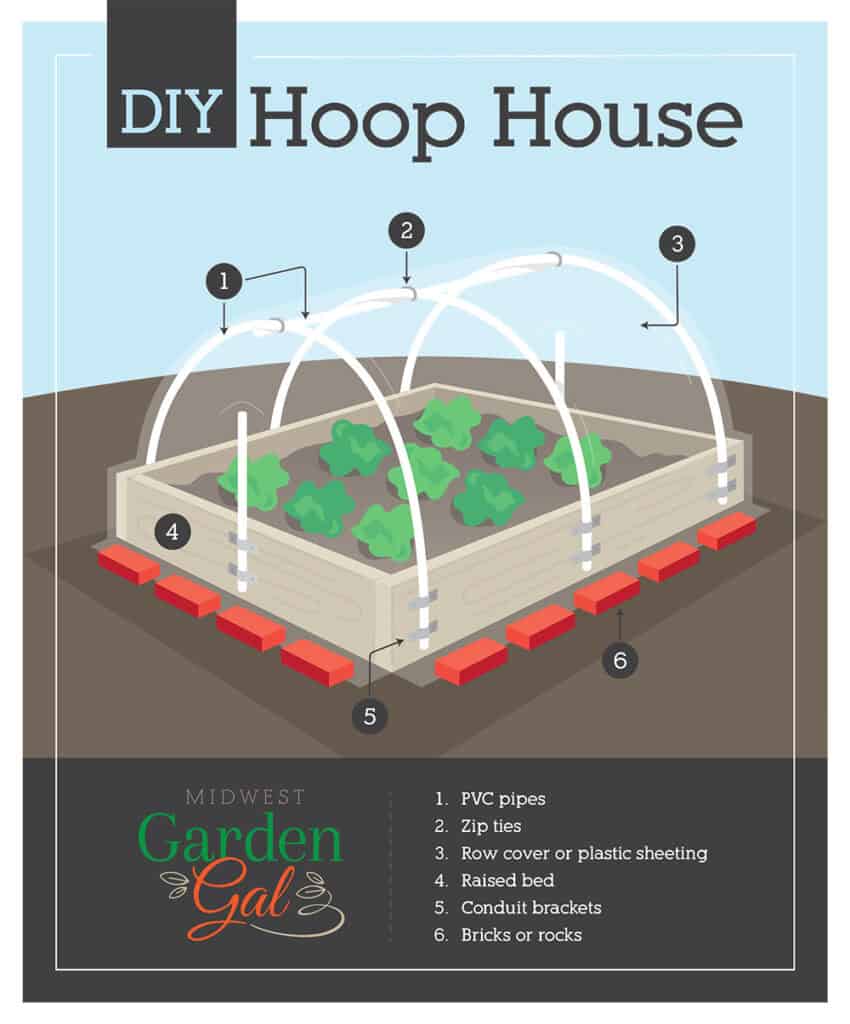
Materials Needed
- (4 – 6) 10’ lengths of 1/2” plastic PVC pipe – for hoops, I use mine full length, cut to size as desired
- (1) Package of heavy-duty zip ties
- (2 to 3) 6 mil greenhouse plastic sheeting – only one is needed, but I buy extra for additional insulation or in case of damage – adjust size to suit needs
- Existing 4’ X 6’ raised bed (modify materials to your size)
- (14 to 18) 3/4” galvanized conduit brackets
- Bricks or rocks to secure sheeting around entire base of bed
Additional materials
- (Package) 1-5/8” exterior grade screws to secure brackets – adjust to thickness of wood
- (10 to 20) greenhouse clamps for 1/2 inch PVC to secure plastic – must fit over hoop diameter and onto the wood of your raised bed
- (1 to 2 per house) Thermometer for inside hoop house.
- (1 per thermometer) Holder/stand for termometer. After much trial and error to find the right way to hold the thermometer in the house, I found that this little flag holder fits my recommended thermometers perfectly. You can add clamps on the cross bar to hold it in your desired location and move as needed.
- Repair tape for greenhouse sheeting – this stuff can be a lifesaver in the event of a rip
Tools
- Cordless electric drill
- Scissors (to trim zip ties)
- PVC pipe cutter or saw
Steps to Build
- Install the conduit brackets along the long sides of your raised bed, about two feet apart. I also add brackets in the center of the short end of the beds to allow for additional PVC pipe to be inserted for extra stability.
- Bend the PVC pipes into hoops and slide them over the stakes or into the conduit anchors, creating a dome over the bed. If desired, trim the length of the PVC to create a shorter hoop house.
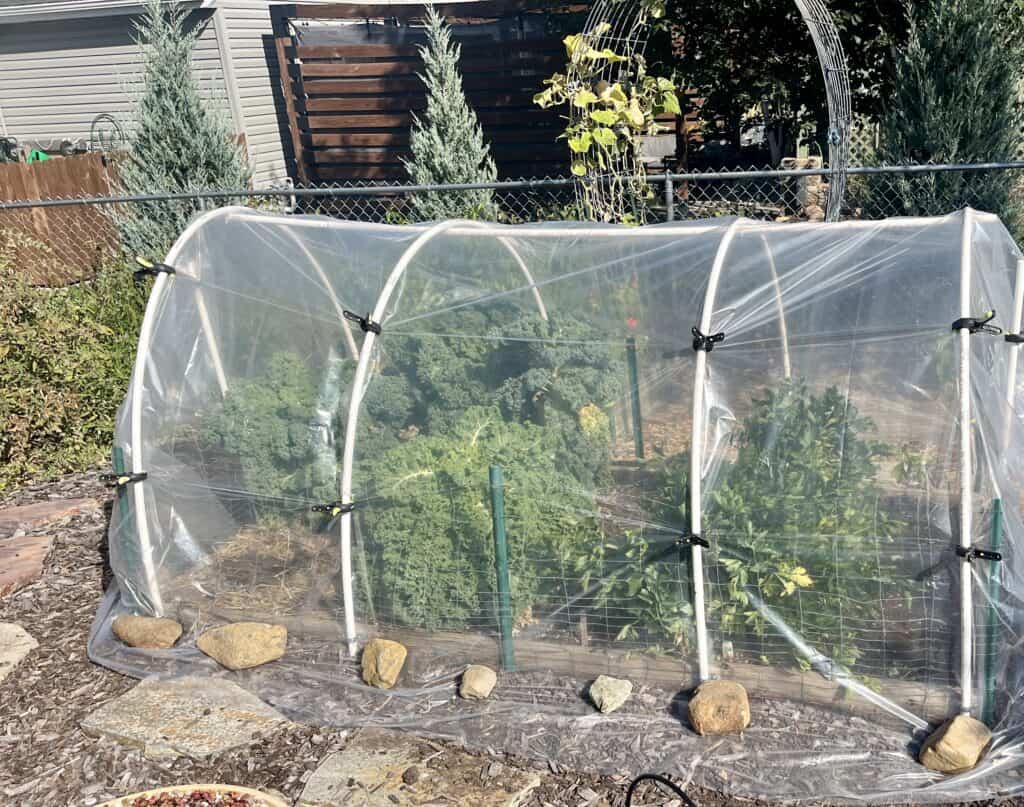
- Drape the plastic sheeting over the hoops, ensuring it covers all sides with extra all over including the bottom sealing your house shut.
- Secure the plastic with clamps or clips, and weigh down the edges with bricks, rocks, or soil to keep it in place.
- Ensure ventilation by confirming that you can open both ends of the hoop house to allow airflow on warmer days. Ventilate whenever conditions are mild enough (outdoor temps at least in the 40s with light winds) is essential to prevent excess moisture which can lead to mold issues. Our plants love the fresh air just as much as we do. Just don’t forget to button everything up tight again before dark if outdoor temps are falling anywhere below the mid-40s. Don’t risk this. Winter temperatures can fluctuate a great deal and surprise event the most seasoned weather forecasters.
Managing the Hoop House Through Winter
Maintaining a productive winter garden means paying attention to temperature, ventilation, and moisture levels inside the hoop house. Here are some key management tips:
Temperature Control
- Sunlight warms the hoop house during the day, but on particularly sunny days, it can get too warm. Open the ends of the hoop house for ventilation when interior temperatures rise above 50-60°F (10-15°C). Avoid exceeding 80°F (27°C) when possible. These cold-season crops do not love the heat.
- Harvest timing – do not be immediately alarmed if you discover after a cold night and a rebound in temperatures that the leaves on your crops have frozen or are extremely wilted. This does not mean the plant is dead. Remember the roots are intact. Let the temperatures rise in the house and examine the plants later in the day. Harvest when things have thawed out. For best success, hargest plants when temperatures are more mild. Never harvest still frozen foliage as that can damage the entire plant.
- At night, the temperature inside will drop. If temps are falling into the 40s, consider adding an extra layer of row cover fabric inside the house before the thermometer drops.
- Extreme cold, well below zero, presents additional challenges for your hoop house. Sustained temperatures well below zero may end your growing season for most of the vegetables in your hoop house. Hopefully by the time this kind of cold sets in, you’ve enjoyed several more months of gardening thanks to your hoop house. Now it’s time to rest and dream of spring.
- Going beyond – For more advanced unheated hoop house gardening, consider installing a larger wood and greenhouse plastic structure over your existing hoop houses. This multi-layer of protection can provide an even longer sustainable growing season in very bitter cold. For most of us, this larger structure is space and cost-prohibitive, but if you have the space and the means, it may be something you want to investigate.
Watering
- Watering your plants before a forecasted frost is actually protective. The extra moisture plumps up plant cells and enables them to better shake off colder temps. As we head into winter, however, plants need less water. With cooler temperatures, less evaporation occurs. Your job now is to make sure the soil doesn’t dry out completely. Water only when the soil feels dry to the touch. Then water very lightly and infrequently. Plants experiencing considerable cold, do not need much water as they are existing in a state of near dormancy.
Snow and Wind Management
- Carefully clear snow off the top of the hoop house to prevent excess weight from damaging the structure. Snow left on your hoop house also blocks essential sunlight preventing house heating and photosynthesis needed for effective plant growth.
- Secure the plastic tightly to the frame to protect against winter winds. Sealing your plastic cover completely with clamps and entirely at the bottom with bricks, rocks or soil is essential in extreme winds and especially when combined with very cold temps.
Winter Gardening Schedule for Zone 5 and 6
Since both Zone 5 or 6 can experience early frosts, it’s important to plant early enough in the fall for crops to get established before growth slows in the winter. Here’s a simple schedule to guide your winter gardening efforts.
Late Summer (August-September)

This period is crucial for establishing crops that will grow through the fall and be ready to harvest during the early winter. Many crops should be planted now to take advantage of the warmer soil temperatures. My Grow Guide in the 6 Essentials blog post can help you with the complete list of the cold-season crops that can be replanted late summer for fall harvest. Already established spring plantings like celery, spinach or first or second year kale that are still in good shape, can carry on under cover and give you some early undercover harvest options. Experiment with succession planting to provide crops at different maturity levels and harvest points. Many of these same crops are well suited to carry on under cover! Read on for specifics for moving into a hoop house for cold-season protection.
This time of year, I most commonly direct sow cold-season crops directly into my raised beds. The big advantages in late summer/early fall are warm soils and mild temperatures. Warm soil equals fast germination for your seeds. During this time before you go under cover, water regularly and keep the soil moist. These are seeds and baby seedlings and they need to stay moist.
- Sow seeds directly in the raised bed. For all of these, I’m planting them from seed in raised beds August into September. All except for kale and spinach will be covered in the hoop house before for the first frost. I let kale, carrots, spinach, radish and turnips enjoy a few frosts in the 30s which leads to a sweeter crop, but when we head into the upper 20s, under the covers they go too. Be careful about this, remember that temps reaching 28 degree Fahrenheit is known as a hard freeze or killing freeze and it is no joke. While I have had kale, and more rarely, spinach, winter over unprotected, I wouldn’t risk it.
- Radish: Our fast growing, wonder vegetable. Sow seeds in succession every week starting in August well into October. Maturing in less than 25 days, read your seed packets and plan to check this crop regularly when temperatures all you to be in the hoop house. And if you haven’t tried roasted radish, please do! Drizzle with olive oil, sea salt and pepper. Roast at 400 degrees for 25 min until tender, tossing halfway through. Yum!
- Kale: Sow seeds by mid-August. Existing plants in good shape that you planted in the spring or the prior year may also carry on living and producing.
- Carrots: Sow by late August for overwintering and early spring harvest.
- Beets: Sow in early August for fall harvest.
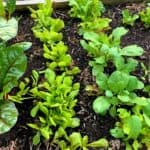
- Swiss Chard: Direct sow or transplant in mid-August.
- Spinach: Direct sow in early to mid-September.
- Others to experiment with: Arugula, Beets, Bok Choy, Choy Sum, Kohlrabi, Leaf Lettuce, Parsley, Green Onions (Scallions), Turnips – reference your seed packet for days to maturity, but realize that growing under cover is an entirely different experience and timing may shift.
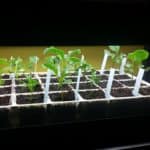
- Transplant broccoli and cabbage: For these crops, give them a head start by purchasing restocked transplants at the nursery or grow them under grow lights starting weeks earlier from seed following the package directions. Seed starting is an entirely additional level of gardening, so if you haven’t found a late summer restock of transplants or you’re fairly new to gardening, go with the crops described in the sowing seeds section above.
- Water regularly to ensure strong germination and growth, but reduce watering as temperatures cool in late September.
- Monitor for pests & fungus issues: Even in a hoop house, cold-weather pests like aphids and slugs may appear. Keep an eye on plants and use organic solutions, such as Neem oil if necessary. I garden insecticide-free during the regular growing season, however inside a grow house where there are no pollinators, very limited use of an organic solution works for me. Please take this step only when absolutely necessary, as in you see insect activity or a fungus starting. Most years, I don’t see any pests or fungal issues, but once in awhile a few hitchhikers can take up residence in the cozy bungalow you’ve created. The wonderful thing about limited use Neem oil, is that the right product choice will serve dual purpose. It is both an insecticide and a fungicide. The warm, moist conditions might also start some mold or fungus growth. For either or both problems, this one product will take care of it. Please remember though, that I do not recommend using any products when pollinators are active during the spring – fall months.
Fall (October-November)
This is the period when frost becomes a risk. For any remaining warm season crops, 32 degrees is a frost and spells the end of their life span. Harvest all of your remaining warm season crops before the first frost of fall. For me that means sometime in early to mid-October. I’m the one you’ll find out in the garden, in the dark, wearing a headlamp under a frost advisory with falling temps looming and tomatoes still on the vine. Despite thinking this will be the year I’ll be ahead of this, it always seems to catch me. Sound familiar?
For the cooler season crops we’re focusing on however, 32 degrees and further down into the 30s can actually sweeten your harvest. The flavor of cold season crops like kale and spinach can actually improve when frosts visit. Once you fall folder than the 30s, though, I recommend you go under cover in your hoop house to help your plants stay harvest-worthy for longer.
- Install the plastic cover over your hoop house in late October right before first frost. Many of these plants can shake off a frost, but why stress them unnecessarily.
- Mulch your vegetables to insulate them.
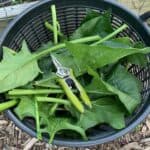
- Harvest early crops like radishes and baby spinach.
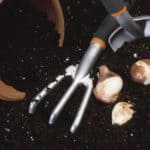
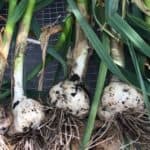
- NOT UNDER COVER – Plant garlic bulbs in October for harvest in June. Note that hardneck varieties of garlic are cold hardy and require periods of very cold temperatures for best bulb formation. I do not recommend growing garlic inside a hoop house, but rather unprotected outside. My garlic loves growing in raised beds in the wide open with only a deep layer of straw or leaves for protection. Check out my complete guide on growing garlic for details.
Winter (December-February)
- Harvest cold-hardy greens like kale and Swiss chard as needed.
- Monitor temperature and ventilate, especially on sunny days.
- Check soil moisture and water sparingly.
Early Spring (March-April)
- Continue harvesting overwintered vegetables.
- Sow early spring crops like peas, lettuce, and radishes inside the hoop house.
- Remove plastic covering during warm days but keep it handy in case of unexpected frost. Gradually transition to a more open environment as temperatures stabilize.
Repeat the cycle for years to come!
Winter gardening in USDA Zone 5 or 6 may seem daunting, but with the help of a hoop house over a raised bed, it’s entirely possible to grow fresh produce throughout the cold months. By selecting the right crops, properly managing your hoop house environment, and following a winter planting schedule, you can enjoy the benefits of year-round gardening.
Happy winter gardening!
SHARE IT ON PINTEREST